 |
|
 |
 |
 |
 |
 |
|
"MALCOLM DRILLING" CAT 365B L w/ Lo Drill Base Model: Norscot CAT 365B L Scale: 1:50
Here is my custom built CAT 365B L excavator with Lo Drill in "MALCOLM DRILLING" livery. You can see just the shear size of the drills bit alone with that man standing beside it..The model is based on a Norscot CAT 365B L excavator and has been equipped with a 4 piece Lo Drill kit from M.K.D. Co.
I removed the cheap rubber Norscot tracks and replaced them with black solid linked tracks
Front and side view all decaled and painted in MALCOLM colors
Rear view
View of the opposite side... The M.K.D.co. kit comes with 4 pieces; the drill bit, the center boom to shaft mount, the top hanger, and a hydraulic box- (see here)
Everything is water decaled and painted in the proper MALCOLM colors and logoing
Here's a close-up of the drill auger bit
I installed brass shieves to run the hook line cable over the ringer
Installed the proper hydraulic lining
Created a brass pulley wheel for the hook line cable on the shaft to boom mount
Created dual hrdraulics cylinders to lift the main shaft
Pic with the cylinders fully raised
Close-up of the shaft to boom shaft mount
Hydraulic lines run to a centeral boom hydraulic distribution box
Installed a workable lifting hook
The Lo Drill lifts and lowers
Tilts forward and backwards
Entire structure folds up and in tight for transport
Photo with the excavator boom lowered and the Lo Drill mast fully lowered
Photo with the excavator boom lowered and the Lo Drill mast fully lowered and the second stage of the drill fully extended out
Second pic to show just how incredibly deep this baby can drill when at max depth
The shaft is composed of two brass tubes a 7/16" and 13/32" allowing one to slide tightly into another
Photo with the drill fully extended out on a flat surface
To team up with the 365B L Lo Drill I also painted up a CAT 924G loader in MALCOLM colors and logo's for out at the job site
M-A-L-C-O-L-M
...and one more pic of the loader
The kit that M.K.D. Co. provides is an awesome one of a kind base kit, its cast out of strong white metal and is very easy to work with. If your into customizing and have allot of patience I recommened you get this kit and create one yourself! I enjoyed created this model and am actually quite pleased with its end result so I hope you like too!
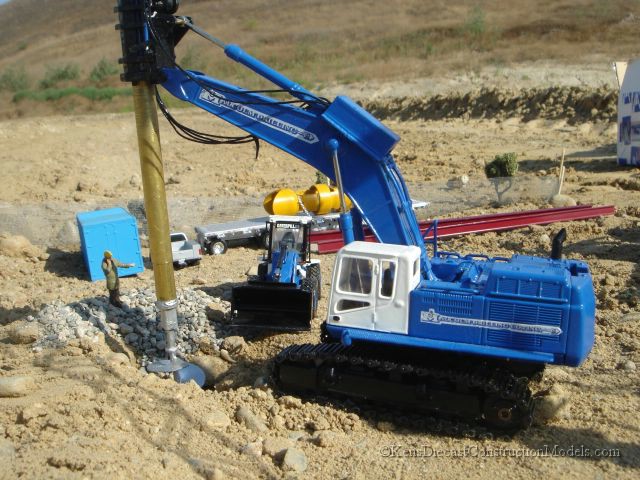
Here's a shot of the drilling machine at work drilling the deep base piler holes for what will soon hold in the foundation posts for a new freeway overpassing
Another in action shot of MALCOM's LoDrill here drilling the pilier holes for what will hold up the foundation for the new Highland resort and casino hotel
|


|
|